Friday, September 28, 2012

Jr. Legal Pad Folder

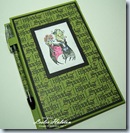
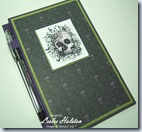
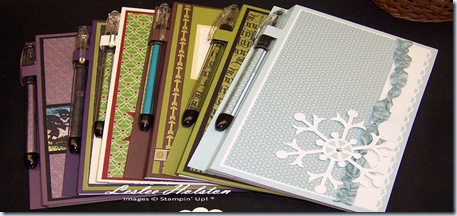
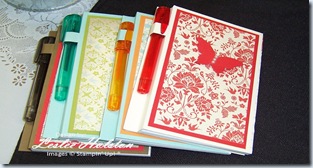
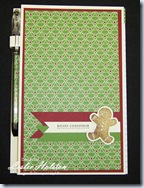
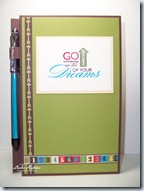
100_5458     I had said in my previous post that I would show another use for these cute and crafty Pentel® RSVP pens.  While they are still “stuffed” with a strip of DSP, I’ve added them to a Jr. Legal Notepad Folder.  This is such a nice way to tote around a legal pad for taking notes.  Who wouldn’t want to show off one of these? 
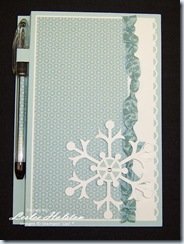
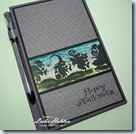
100_5464     Now, I can’t take credit for the folder design.  I found a great tutorial on Melissa Stout’s blog, The Stamp Doc.  You can find that tutorial here.  Melissa gives fabulous directions and these are extremely easy to put together.  The most difficult 100_5419(and most fun) part about these is deciding how to decorate them.  And you must not forget the inside too :)    
     Here are a few of the designs I had made for the vendor fair.
  100_5409100_5408100_5412

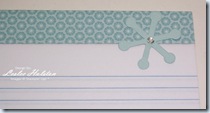
100_5443      I made a few mini ones as well.  I had found a package of mini gel pens in the discount bin for .50 cents and just had to try.  I had to reconfigure the folder dimensions but that wasn’t difficult.  These were super easy because there isn’t a lot of room for decorating.  A simple punched Elegant Butterfly and some Jewel Basic Pearls and it’s done!   
100_5461     These would make lovely teachers gifts, hostess gifts, or just about anything you can think of.  Occasions and themes can be easily changed simply by the DSP and images you use.  Gotta love versatility!  Thanks for stopping in today.  I hope you’ve been inspired to make one (or more) of these for your next giving occasion.  100_5398Of course, you don’t REALLY need an occasion to make someone’s day :) 
Hugs,

Leslee


Wednesday, September 26, 2012

Staff Membership Incentives

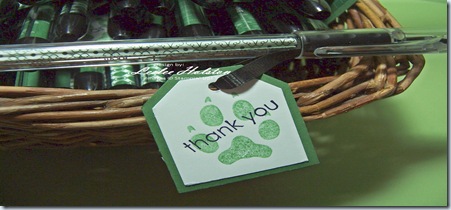
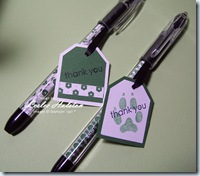
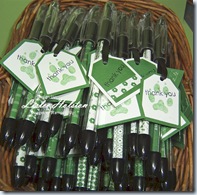
100_5338      As many of you know, I am pretty active with the elementary school PTA.  Each year, the PTA sponsors a Staff Back to School Luncheon.  For the past several years, I’ve done just a 100_5340little something extra for our staff/teacher membership incentives.  This year was no exception :)  Through our labels program, I was able to get the fabo Pentel ® RSVP pens that us crafters love so much.  Yep…I sat and stuffed each one (84 in all) with a strip of retired DSP.  In this case, Garden Green Patterns DSP because that’s our school colors :)  After the first 20…you get the hang of rolling and stuffing the DSP…hehe.  I then punched out a slew of tags using the tag and large tag punch.  They are simply attached to the pen by catching the curling ribbon up under the pen cap.  Much easier than trying to tie each one on.  Work smarter!  I borrowed the grizzly paw stamp from the school…go Grizzlies!  100_5342Our little motto is GBE…Going Beyond Expectations and I think I did just that with these pens.  The teachers and staff LOVED them!  And they are worth it!

     Thanks for looking.  I hope you’ve been inspired to do something nice for your child’s teacher.  I’ll show you another use of these “stuffed” pens in my next post.  Until then, keep inky my friend!

Hugs,

Leslee

Monday, September 24, 2012

Fall for Triple Time Stamping

100_5362     I have really enjoyed the Triple Time Stamping technique.  I presented this technique to my August stamp clubs but instead of layering centered on top of each layer, we made our layout just a bit different.  However, the technique of layering, stamping and then matting is the same.  For this particular card, we also threw in the collaged look.  The French Foliage 100_5359set is perfect for this look.  We added a touch of Rock-N-Roll in there too.  That’s a great way to add additional color to a stamp image.  I ink the image up with a light color and “rock” the edges around in a darker color ink.   This card also features the use of the new Stampin’ Spritzer (item #126185).  I fill the spritzer tube 3/4 of the way with plain old rubbing alcohol and add about 5 – 10 drops of re-inker.  When spritzed, the alcohol dries very quickly leaving only the spritzed ink. 
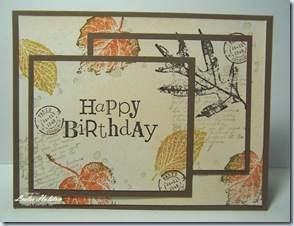
     Lots of techniques on this one little card :)  and it is relatively quick and simple to do as well.  Got to love that!!  Thanks for stopping in today.  I hope you’ve been inspired to throw more than one technique on a card or project today :)

Hugs,

Leslee

All supplies are Stampin’ Up! and can be purchased here.

Friday, September 21, 2012

Broom Hilda

100_5467

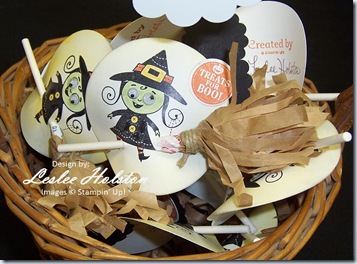
     I picked up a bag of small lollipops.  I just knew I could make something with them.  These cute little brooms immediately came to mind.  You see, I had just received my new Ghoulish Googlies Bundle and was itchin’ to play.  This cute little witch was in need of a broom.  That’s right…Broom Hilda is her name!  The packing paper that Stampin’ Up! uses in the shipping boxes was recycled for the broom head (I guess that’s what you call it?).  I fringed a strip of the kraft packing paper and wrapped it around the lollipop.  It is secured to the sucker stick with Hemp Twine

     I made a couple dozen of these cuties.  Enough to include in with my stamp club orders last month and a bunch for the vendor fair.  It will make a sweet little classroom goodie as well :)

     If you aren’t familiar with the Holiday Catalog, Stampin’ Up! is now offering bundles with this catalog.  Buying in bundles not only gets you coordinated products but it saves you money too…15% is saved…and there are several bundles to choose!  Check it out for yourself…this is a really good thing! 

     Thanks for stopping in today.  Broom Hilda has cast her spell and I know you’ve been inspired to use a recycled item today :)

Hugs,

Leslee

Thursday, September 20, 2012

Oh the web we weave…

100_5346

      A few weeks ago, I posted a card using the Watercolor Dry Embossing technique.  Whilst I wasn’t completely happy with the finished project, it did inspire this card. 

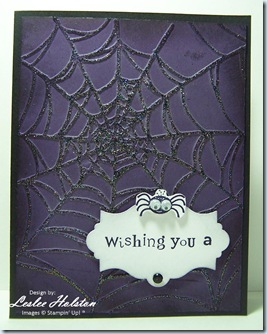
     I used the same basic technique only I omitted the watercoloring.  I’m calling this technique, Embossed Embossing (although, I’m sure it’s been done before and it was probably given some other name but I’ve not seen it).  Using the Spider Web Embossing Folder, I ran a piece of Elegant Eggplant through the Big Shot.  I then used my brayer to roll on VersaMark Ink onto the raised webbing.  You’ll want to use a firm but light hand with the brayer as you don’t want to compress the embossed image and get ink in between the web.  I sprinkled on Iridescent Ice Embossing Powder and set it with the Heat Tool.  Such an awesome look it has given the web.  It went from “cool” to “WOW!” in no time flat!  I finished it with a touch of sponging around the edges with Basic Black100_5355The spider is from the new Googly Ghouls set.  The sentiment is out of the new Wacky Wishes hostess set.

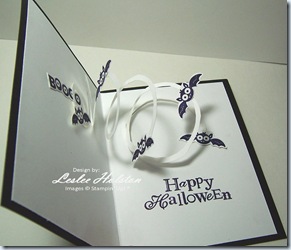
     For the inside of the card, I made a pop-up by spiral cutting a circle and adhering the ends to opposite halves of the card.  The most difficult part to this card was cutting out all those little bats but they sure are adorable hanging there in the air :) 

     We did this card in August’s stamp club.  Yes, they may have thought me a bit batty but the ladies all seemed to enjoy the project.  I’m glad you stopped by today.  Let me know what you think.  I love to hear from you :)  and hope you’ve been inspired to weave a web yourself…it doesn’t have to be wicked ;)

Hugs,

Leslee

Stampin’ Up! supplies can be purchased here.

Wednesday, September 19, 2012

Cool Candy Treats

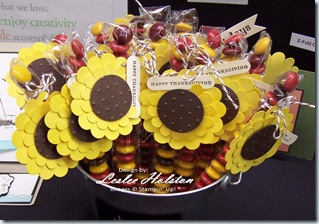
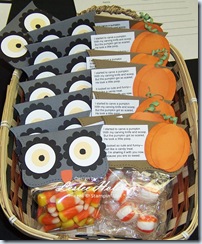
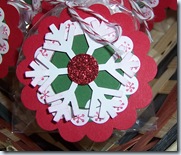
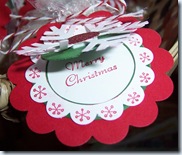
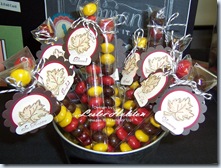
100_5448100_5457      I made a variety of little candy treats for the vendor fair.  I wanted people to see several different ways of simple packaging. 

     As we all know, it’s all about the presentation!  Don’t those candy corn treats look so very yummy in that cutie of an owl?  The Christmas treats are simply soft mints but the packaging makes it look like the recipient is really getting something grand.  I’ve made these before for my PTA peeps 100_5427and they loved them! 

     Mass production is the key.  The ability to punch out all the components and then assemble makes these treats quick and easy.  Thinking up a design is the most difficult part of it all.  Once that’s done, it’s smooth sailing :)  Of course, you can NEVER go wrong with chocolate!100_5428

     Some of my supplies used:  2-3/8” Scallop Circle, 1-3/4” Scallop Circle, 1-3/8” Circle, 1-1/4” Circle, 3/4” Circle, Word Window punch, Extra Large Oval punch, Peekaboo Frames Bigz L Die, Top Note Die, Perfect Polka Dots Embossing Folder, Red Glimmer Paper, 1” x 8” Cello Bags, Baker’s Twine and various colors of card stock.

100_5450     Thanks for stopping in today.  I hope you’ve been inspired to make a pretty presentation of some sort today :)

Hugs,

Leslee

Monday, September 17, 2012

Back To School :)

  100_5445

     The vendor fair that I recently attended was promoted with a “Back to School” theme to it.  So, keeping that in mind, I created a few items that would fit that theme.  Pencil packets and bookmarkers :) 

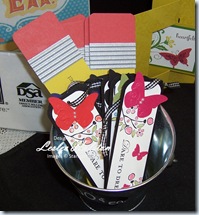
100_5447      The bookmarkers were super easy.  I did two designs.  The first was the butterfly bookmarks.  Very elegant.  I used the Bordering On Romance and Loving Thoughts sets.  Colored in the image with classic inks and Blender Pen.  The butterflies are die cut from the Beautiful Wings Embosslits Die

     The pencil bookmarks were a bit more labor intensive but, being mass produced, they went together very quickly.  The ‘eraser’ is in the retired Really Rust (finally I found a use for it), the ‘metal band’ is Brushed Silver put through the crimper tool (retired).  The ‘wooden pencil part’ is Summer Starfruit.  I put a couple of score lines down the length of it with the Simply Scored Tool.  The tip is Crumb Cake with the ‘lead’ tip scribbled in with real pencil :)  Jess told me that was a nice touch to the bookmarker.   I stamped on different sentiments from several different sets.  I love how these turned out and think I’d like to make one for each of my son’s classmates.

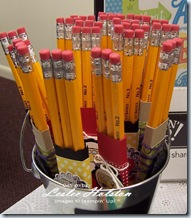
100_5441     These cute little pencil packets were super quick to make as well.  A few score lines with the Simply Scored board, a little bit of DSP banded around it and a little school themed image…punched and layered onto a Scallop Circle.  Sorry, I didn’t get a photo of the individual packets showing the images :(  Trust me when I tell you, they really are darling! 

     Thanks for stopping in today.  I’m so glad you did.  I hope you’ve been inspired.

Hugs,

Leslee

Current Stampin’ Up! supplies can be ordered here.

Wednesday, September 12, 2012

My First Fair

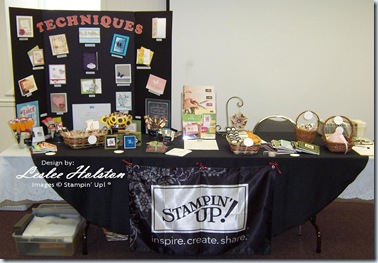
     They say that time flies when you are having fun!  I guess so…it’s been weeks since my last post :(  I have been busy, busy, busy but in a good way :)  I participated in my first vendor fair over the weekend.  I’ve been busy prepping and preparing for that.  It was a great experience and something that I’ve been wanting to give a try for awhile now.  I made absolutely no money but I did recoup my table fee and some of my display item costs (things like a black table cover and a Stampin’ Up!® banner, baskets, catalog holder and the like).  Being that it was my first fair, I spent quite a bit in preparation but it is something that I won’t have to re-purchase for the next fair.  Yes, there WILL be a next!  I had a wonderful time!  The best part…I made some new customers and friends to boot! 

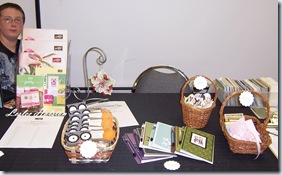
100_5435     This is my table display.  I like how it turned out.  My son, Jesse, helped me to make the “Techniques” board.  It displayed some of the beautiful cards we’ve made at stamp club using certain techniques.  Fun stuff like the Dryer Sheet technique, 100_5438Shaving Cream technique, Reverse Masking, Brayered Backgrounds, Shadow Stamping, Faux Mother of Pearl and so on.  The board was a great conversation starter and I was able to lead into talking about stamp club as well.

     Jess also came to give me a hand with everything before, during and after the fair.  There he is in the corner of the photo.  I just happened to catch him :)  He was a huge help (especially toting box up and down the stairs to and from the car)!  I enjoyed having him with me at my first fair.  It really helped with the first time jitters :)  Love that boy!   100_5439

     That’s all for today.  I will blog about some of the projects I had to sell in the upcoming days.  Some are past favorites and some are new for me :)  Thanks for stopping in today.  I hope you’ve been inspired :)

Hugs,

Leslee